Sunday, March 29, 2009

Class Up Your Kitchen Cabinets

Since I can't stand spending a week relaxing, I decided to take on the task of replacing the inserts in our kitchen cabinets with glass or make them look "classy," as the hubby said to me once I finished. There was one mistake made along the way, but it was nothing a lot of frustration and elbow grease couldn't correct.

Due to the way our cabinets were assembled, there are metal pieces that stick out of the corners inside. I knew about these when I went to the hardware store to get the glass cut. I asked that he cut it inside the measurement I gave him, but he was an expert glass cutter apparently because he cut it exactly! So, when I went to lay the glass on the molding, it wouldn't fit because of those darn metal corners sticking out. Ugh! I had to disassemble the molding and fit the glass in first, under the metal corners.

Anyhow, they're done now and I love them! I think I'm officially done working on the kitchen cabinets.

Here's are the pics and how-to info. Click on the pictures to enlarge and check out the details.


Yay! All done!
My neighbor was part of my inspiration for this project. Yesterday, my neighbor told me that her project cost her over $200 because she purchased fancy looking glass and had the shop install the glass after she'd cut out the centers. I purchased double-strength glass for $30 and molding for $18. I already had the glue, primer, paint, and clear caulk.
Total cost for this project: $48. That includes tax! Looks like I saved myself at least $152!
What do you think?

Friday, March 27, 2009

Friday Inspiration (or too much free time)

I'm so ready for the weekend. I've been ready since yesterday. So, guess what I did today...I acted as if it was the weekend. With all this "weekend" free time, I whipped up this little ditty. Check out the link below the board for details. I'm heading out the door!

Classic Safari

I thought I'd be fun to create a totally different room using one of the same items from last week. Do you recognize it? I have it at home too! Oh, this is definitely not on a budget. 

Thursday, March 26, 2009

Projects Galore!

Since the new couch arrived and I tweaked our living room a bit (I'll post pics this weekend), I've had this terrible feeling that I might be running out of projects. This was the hubby and I while laying in bed the other night:

N: I'm sad.

Hubby:Why's that?

N:I love what the rooms are looking like right now. I especially love the living room. The new curtains and rug for your office look great. But, it makes me sad to think that I may be running out of projects.

H: Really?! You still have the fireplace to re-tile.

N: Yeah, I guess, but it's a biggish project. What about my crafty little projects. What am I going to do next??? I gave the hubby a sad puppy dog look.

H: Oooohh...you'll find something.

He is oh so super sweet and supportive of my projects. He knows they help keep me sane.

In reality, when I think real hard about projects, I guess there are actually quite a few I'm ready to take on. Like the hubby said, I have tile and supplies waiting to be turned into magic around our fireplace. I just know it's going to be a real mess. So, I'm waiting. Also, a few weeks back my neighbor inspired me to put glass in some of our kitchen cabinet doors. They look fabulous. Since then I've been noticing tons of cabinets in magazine kitchens with the same glass inserts. So, this past weekend I kindly asked the hubby if I could experiment with the cabinets in the laundry room before tackling the kitchen ones. The result...fabulous! Although they look great, (fancy cabinets in the laundry room, woo) I'm a little nervous about trying out my idea on the kitchen ones because they've been painted. But then again, I could just touch them up. I painted them! duh. In order to boost my confidence and give you an idea of what I'm thinking of, here's a sampling of glass in kitchen cabinets! LOVE IT!

KITCHEN%20CABINETS%201.JPG


Indoor Stainless Steel Kitchen


The second one up top is my favorite. I house the kitchen belongs in is really cutie. It's colors and style actually remind me of our little house.

What do you think? Should I go for it?

Sunday, March 22, 2009

A Bit of the Sea to See

While on a work related trip down to Long Beach, I encountered one of the cutest little sea shell and random ocean object store ever. Since I saw a sea fan in a frame at my fave store Tarjay, I decided I'd have to tackle my own version of the same thing on a budget. 

I found the perfect sea fan at the little shop in LB for $10. Then, I purchased a small shadow box type frame from Michael's with a discount coupon (I can always count on there being one in our Sunday paper) and a shimmery piece of decorative cardstock to use as the background, all for $10. Total for this project $20. I originally saw it at Tarjay for $35. 

The linen texture of the paper. Love it.
It's ready for a close-up. 
Pretty on our bathroom wall.

In case you can't see, I used a pin with a pearl ball tip to keep the sea fan in place. It's right in the middle.  You can buy your very own sea fan from  SeaCorals.com.

Friday, March 20, 2009

Design me a Room

Since it's Friday, how about some decorating inspiration a la Nate Berkus?

Nate, will you be my friend? 


[NateBerkus1.jpg]


[ED0908_BERKUS_6.jpg]

Thursday, March 19, 2009

Burlap for a Bed

One of my younger brothers has lived with the hubby and me for almost two years. It's been a very interesting past two years. Imagine suddenly being the parents to a teenager; completely skipping the whole growing up thing. I can't say I haven't been the parent to him before because I was like a third parent to him when he was born. He's 11 years younger than me. It's been a growing experience for the three of us.

As a senior in high school he is much more concerned with recording his music and hanging out with his friends than doing things like cleaning his room or sometimes (urgh) doing his homework. As a teacher, the second part really gets to me and the other part just drives me nuts. I was that girl that always made her bed in the morning and cleaned her room for pure enjoyment. Cleaning gives me a great feeling of accomplishment. You can actually see the results immediately. Well, in order to alleviate a bit of my anxiety over his extreme messiness, I've been working to tweak his room to a point where even if it is messy, there will be something that keeps it looking at least a little done up. Crazy, I know.

On my quest to do such a thing, I have made and hung new curtains, bought new linens, new lampshade, new rug, and today a new DIY headboard.

Inspired by the youngsters over at This Young House, I decided to make my own headboard using a frame used to stretch a canvas (bought at an art store for $15), some burlap I already had laying around (I know, burlap? great texture), a roll of upholstery nails (bought with a 40% coupon), batting bought with a coupon from Joanns, and my handy stapler.


Start with the frame and the batting. Staple it all the way around.
After the stapling of the batting, continue with the fabric.
Make sure to keep it nice and taute
Then, add the nails around 3 sides.

Final step, hang up with nails as you would any other canvas.
All done!

I am in love with it. Of course the teenager wasn't as thrilled by the change. Teenagers. Soon enough the room will be clean all the time. I'll miss him when he goes to college. =(

Wednesday, March 18, 2009

Why don't you take a load off?

In the past two years the hubby has heard his fair share of complaints against the ginormous couch he came with. This past week, the complaints suddenly ceased. 

I finally got a new couch!!! Just what I wanted too!!

Now, being the frugal shopper I am, I couldn't just go into a store, pick out a couch, pay for it, and then just lug it home. Oh no. I found us an original Mitchell Gold made for Restoration Hardware slipper-covered beauty of a couch for all of $525 bucks! Yes! What's my secret. You know it and love it, Mr. Craigs(list).

Since I knew the hubby was not into the idea of investing lots of moola on a couch, I decided this was going to be my only chance to get rid of the big honker hanging out in our living room. I'd been scouring the list since about last November in order to find the deal of a lifetime. I finally found it last week. Well, I may have found it before, but I was never the winner; always the runner-up. I actually thought I was the loser again because I didn't get a response for almost three days. Then, out of the blue I received my congratulatory call. I was first in line!

This comfy sweetie is just what I've wanted because of these reasons: 1. it's not ginormous 2. it's a lighter shade that will change the mood in the living room 3. it's slip-covered for easy wash and wear (especially with doggies) 4. in has back pillows that are not attached to the body of the couch because Enzo and Rosco love to sleep there and this in turn slowly tears the pillow away from the back of the couch 5. it's deep for comfy lounging 6. it's a classic style 7. no tennis balls getting lost underneath 8. it's new!

The previous owners owned and used it for only 3 months before they packed it up real nice and tight in order to keep it in storage while they lived in Central America for two years. They came back recently and decided they would rather live it up in Panama and therefore chose to sell off their goods. Lucky me. 

The original couch.

Our affordable lady

Hey, with her new pillow friends. 

I'm thrilled. Now, if I could only keep the pillows in place like that all the time. 

Pillow Talk

Oh my. It's been almost a week since I last made an entry. Poop on me. Yet, I have a good excuse. I've been hard at work at coordinating a couch drop off, yanking a ton of weeds, drinking beers while watching "The Wrestler" in a movie theater (Yes, drinking beers in an actual theater) with the hubs and friends, making new curtains for the little bro's room, re-decorating the hubby's office (work in progress, pics later) lots of work at work, and....making plus pillows!

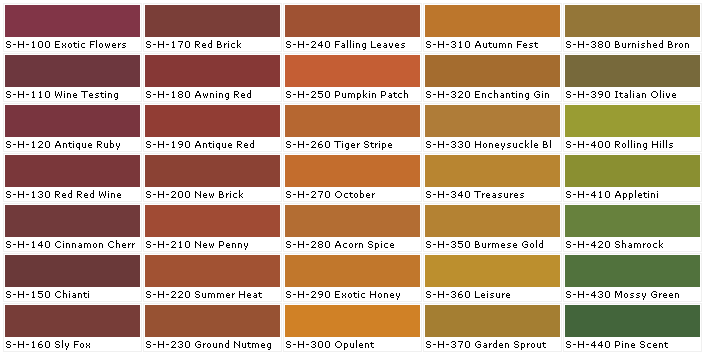
I've also decided to paint the retrofab chair. I was initially hoping to go with a RL color, but couldn't find what I was imagining. I ended finding up my match with Behr "Leisure." Yup, I'll be sittin' in my retrofab chair gettin' my leisure on. Perhaps wearing a leisure suit??
Oh crappers. You can't see the leisure. It's basically a yummy dijon color.

Anyhoo, back to the pillow talk. I was at Michael's crafts a while back and one of the books on their shelf caught my eye; a pillow making book. Fun! I flipped through the pages and suddenly, love. Why don't I just share the result of my book lovin'.

I apologize for the crappy lighting. I made two like the one in the back too.

The dumb flash makes the details of my fishy-like pillow disappear. No bueno! The fabric is this luxurious velvety thing that has a bubble design in the fabric grain. LOVE! The brown one in the back is a lovely linen. Yeah, so count this...1 yellow fishy pillow + 2 brown lovely linen pillows + 1 more striped pillow to create symmetry = lots of sewing, cutting, measuring, and 4 fab pillows!

ooohhh, ahhh.

Here's the so-so how too. My initial plan was to photo every step, but that wasn't very successful because I always end up getting way too into the whole process and forget to actually take pics. Oh well. Here's what I got. Take it or leave it.

Step one: Select a fabric that won't fray when cut with scissors and not sewn. Suede and this velvety one do the trick. 
Step two: Create an outline pattern on the back part of your fabric using a pencil or fabric pencil. I used a carpet cleaner spray bottle for the shape.
Step three: Cut out what seems like a gazillion scallops.
Step four: align the cut out scallops so they overlap and then pin them into place on a separate piece of the same fabric. 
Step five: sew each layer onto the fabric. Make sure to sew each layer so that the layer on top will cover the thread line. 
Step six: Cut the fabric out depending on the pillow size you want. Mine is 12 x 18. 
Step seven: Cut out the fabric for the back part and then sew it into place. I overlap mine so that I have an easy way of taking out the pillow. 

Here's some images to help.


Get this: total for 4 fab pillows = about $20 buckaroos in fabric. Not bad when you think about how one good pillow costs about $24 on its own. Oh, the pillow inserts; I scored big time. The hubby and I found this amazing store where almost everything costs $5! I'm not even kidding. The pillows had this great silk dupioni striped fabric as a cover. Alas, the color did not work with our whole scheme going on here. Zipper open,  super soft down pillow insert out-time for a new cover. Yay! 

Speaking of sewing. If you think you can't do it, you can. It's just a little practice. I've been doing it for a long time, so it's a breeze for me, but I am dealing with an antique of a sewing machine. Seriously, I'll have to take pictures. It's ancient and it weighs a ton! I think a new sewing machine may be in the horizon (hint for hubby: just because you love me gift??).

Thursday, March 12, 2009

Just for Fun...

Hey, it's almost Friday! It has felt like forever since the last weekend. I'm ecstatic that I have a three day weekend. To celebrate, I decided to create a little Just for Fun Friday board.

If I had the magical ability to rearrange and/or completely change my living room, this little ditty would be kinda fun to do. How about a Rustic Adventure, anyone?


Allure Lace Vase from Target
Contour Baskets from CB2
Voyager Trunk from Pottery Barn
Weathered Copper Hammered Metal Lamp from Walmart
Bonaparte Console Table and Jute/Wool Diamond Rug from Pier 1

A girl can dream.

Anything fabulous you're looking forward to?

Tuesday, March 10, 2009

Update on RetroFab Chair

At this point, with the time change, my excitement about getting a new couch (picture will be posted), and what seems like endless essay revising at work, I'm definitely not getting enough sleep. With that said, I have a few other projects ahead of the retro chair and so I haven't had enough time to really think about what I want to do with it.

Yet, there is change. I couldn't just let it be....


The color of the fabric a little greener than what it looks like in the pictures. I love that fabric, so I'm glad to have the chance to use it again. This is one my many fabric loves I'm storing.

What do you think?

Monday, March 9, 2009

Amy Butler, I heart your fabric.

Like I mentioned in my last entry; I love fabric. I've actually been searching for the perfect fabric that includes a nice shade of orange, green, maybe yellow, and blue. Crazy combination, you say. Perhaps, but they are my favorite colors.

I thought I was never going to find it and along came Amy Butler. She has these fabulous big prints in dazzling colors. Like to see?


Umm...yes, I love your fabrics. Her website also has a links to where you can purchase her totally affordable fabric from. Now I just have to decide which one (or two or three) I want.

Visit her website to get the skinny.

Friday, March 6, 2009

P.S. I Love You...Fabric!

Hello. My name is Nancy and I hoard fabric.

If I find something I like, perhaps something with blues, greens, oranges, yellows, browns, and whites...I need it! I think there's something wrong with me. I can't stop buying fabric. You know, I need have to have it now because I may never find it again. That, my friends, would be sad. Oh, so sad.

Take a look at these..


Or this fabulous one. Come on, I need you Quadrille Contessa Fabric.

Hey, look at her! You can find her at Calico Corners
These were just a few of my favorite things. I think I need some more orange in my life. Can you tell?

I've Got Some Puppy Love

When I left for work this morning, the boys (our dogs Enzo and Rosco) were already awake. They're the lazy-like-to-sleep-in type of dogs, so I was a bit surprised when they followed me down the stairs. Enzo, the "big boy" as we call him, because he's the older and "larger" one of the two decided he was ready for a photo shoot by laying on the stairs where the sun was shining perfectly. Rosco, of course could not sit still for one minute. Yet, it was a perfect photo opportunity for this doggie momma. 

I know this may not be decor related; consider the lighting and how beautiful it is. Bringing natural light into your home can do wonders. Also, think about taking photos of your precious pets and blowing them up to display like a poster in a kids bedroom or above your couch. Why not? That's definitely budget friendly.

The Big Boy "Buba," AKA: Enzo Ferrari
My cutie patootie, "Baby Boo," AKA: Rosco P. 

I may be biased being the momma, but these are some hot dogs!